Steps to Configure GitHub insights
1. Select the provider your app is configured with.
- Navigate to the Insights tab in the left sidebar of the SkyU Console.
- Click GitHub sidebar item.
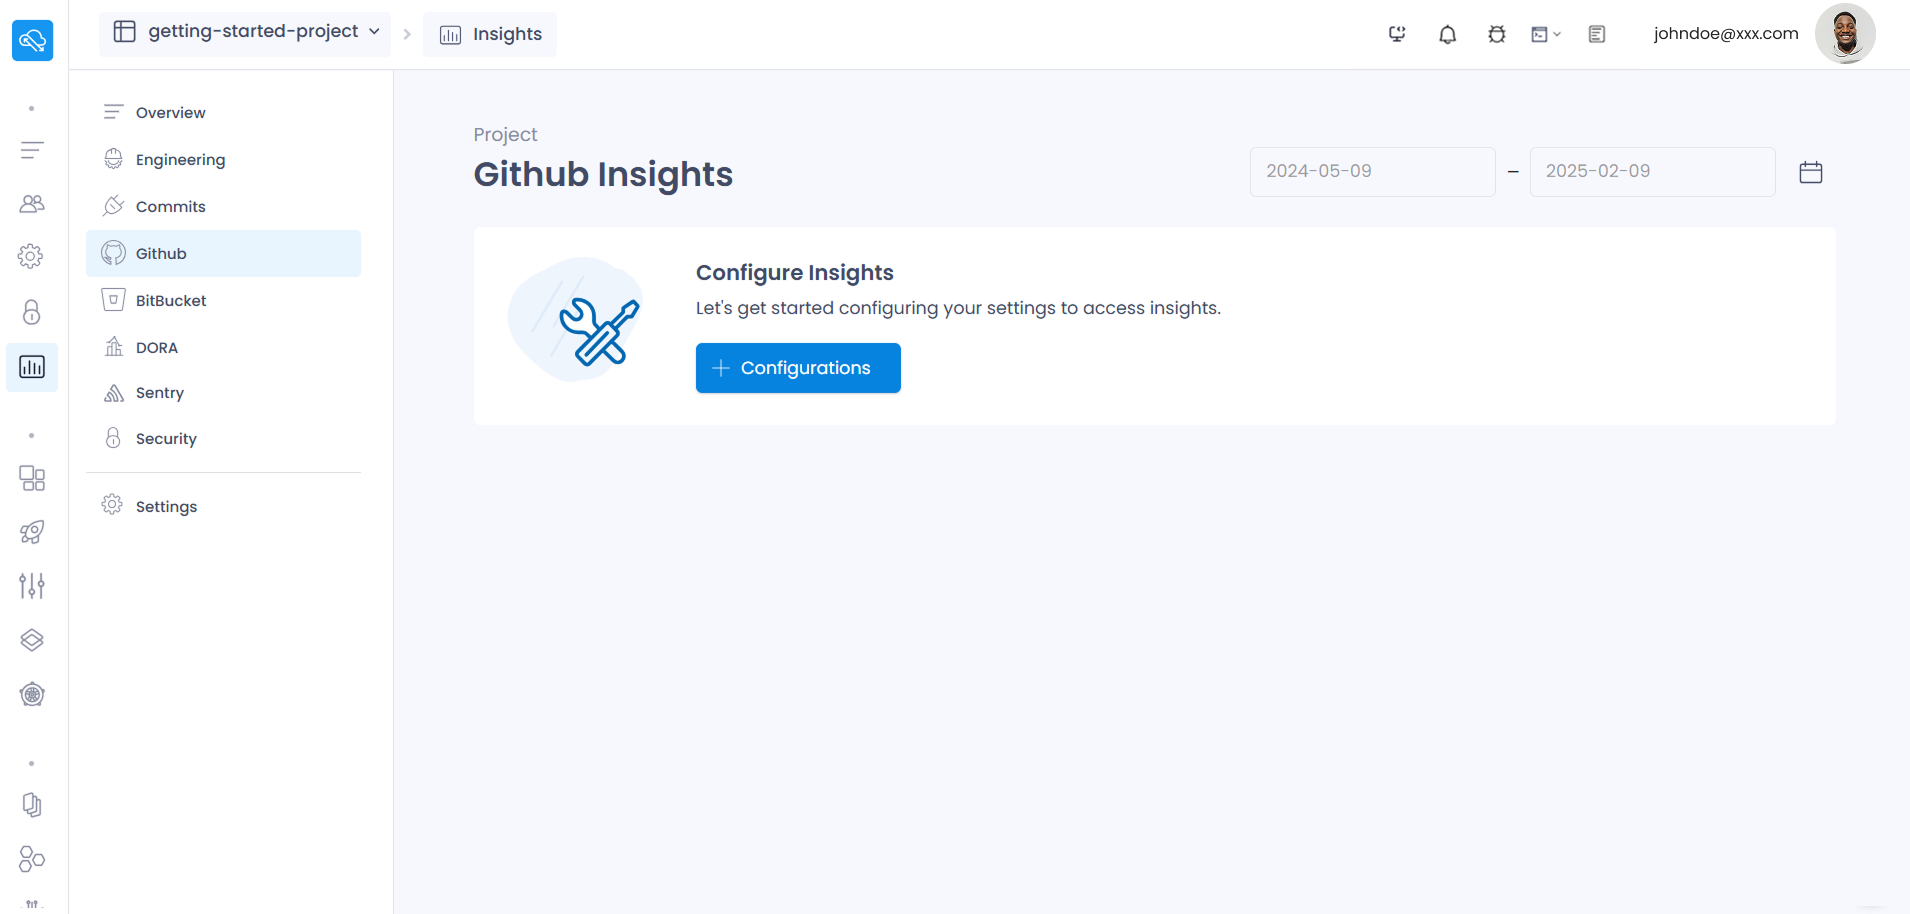
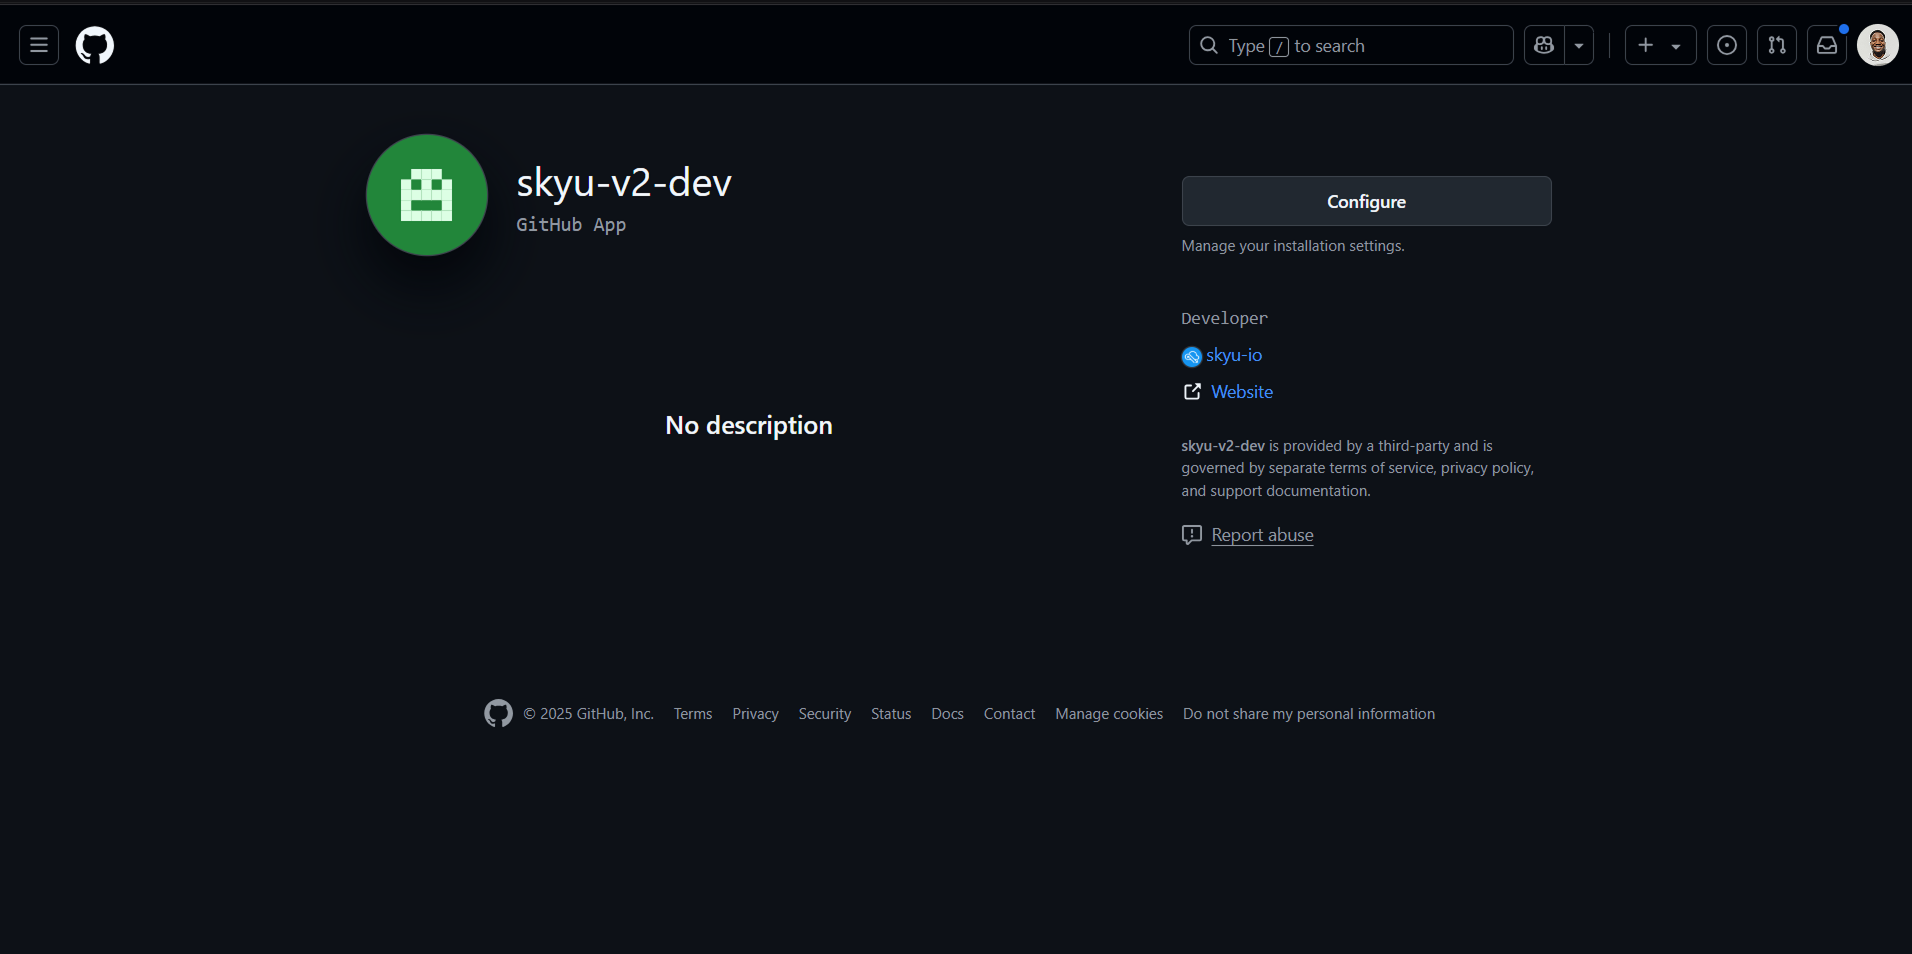
- If your GitHub app is not configured, you will see the below box to configure insights.
- Click the + Configurations button.
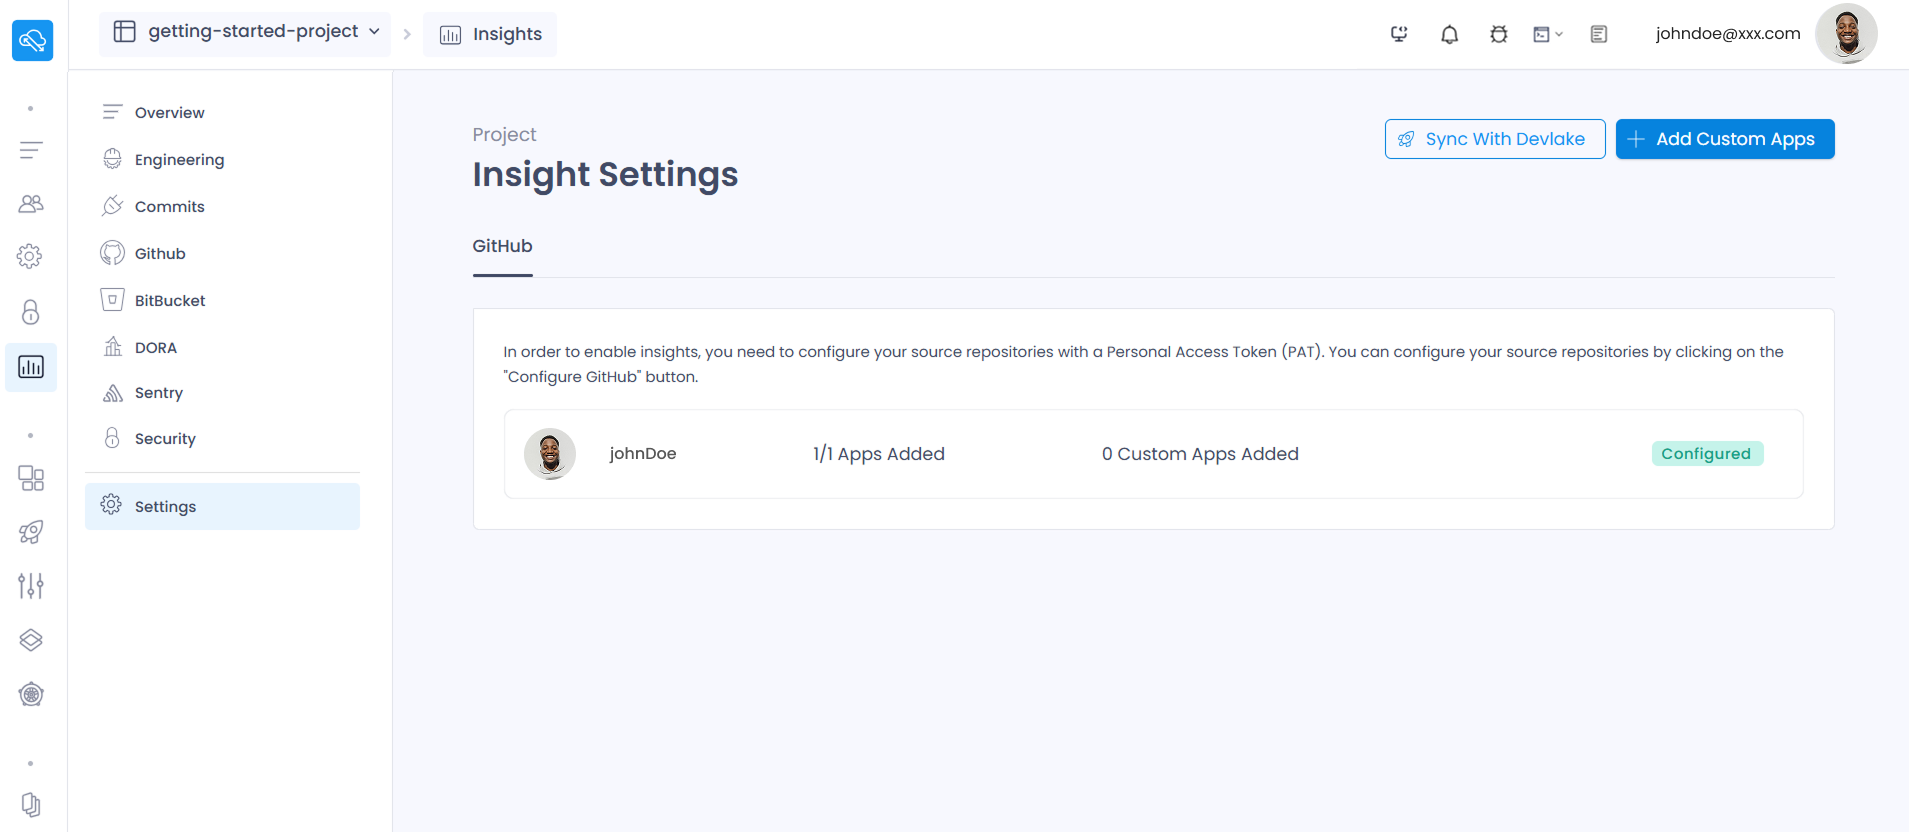
- Now you will be directed to Insights’ Settings page. If you have your app added already, you will see it listed under Github tab.
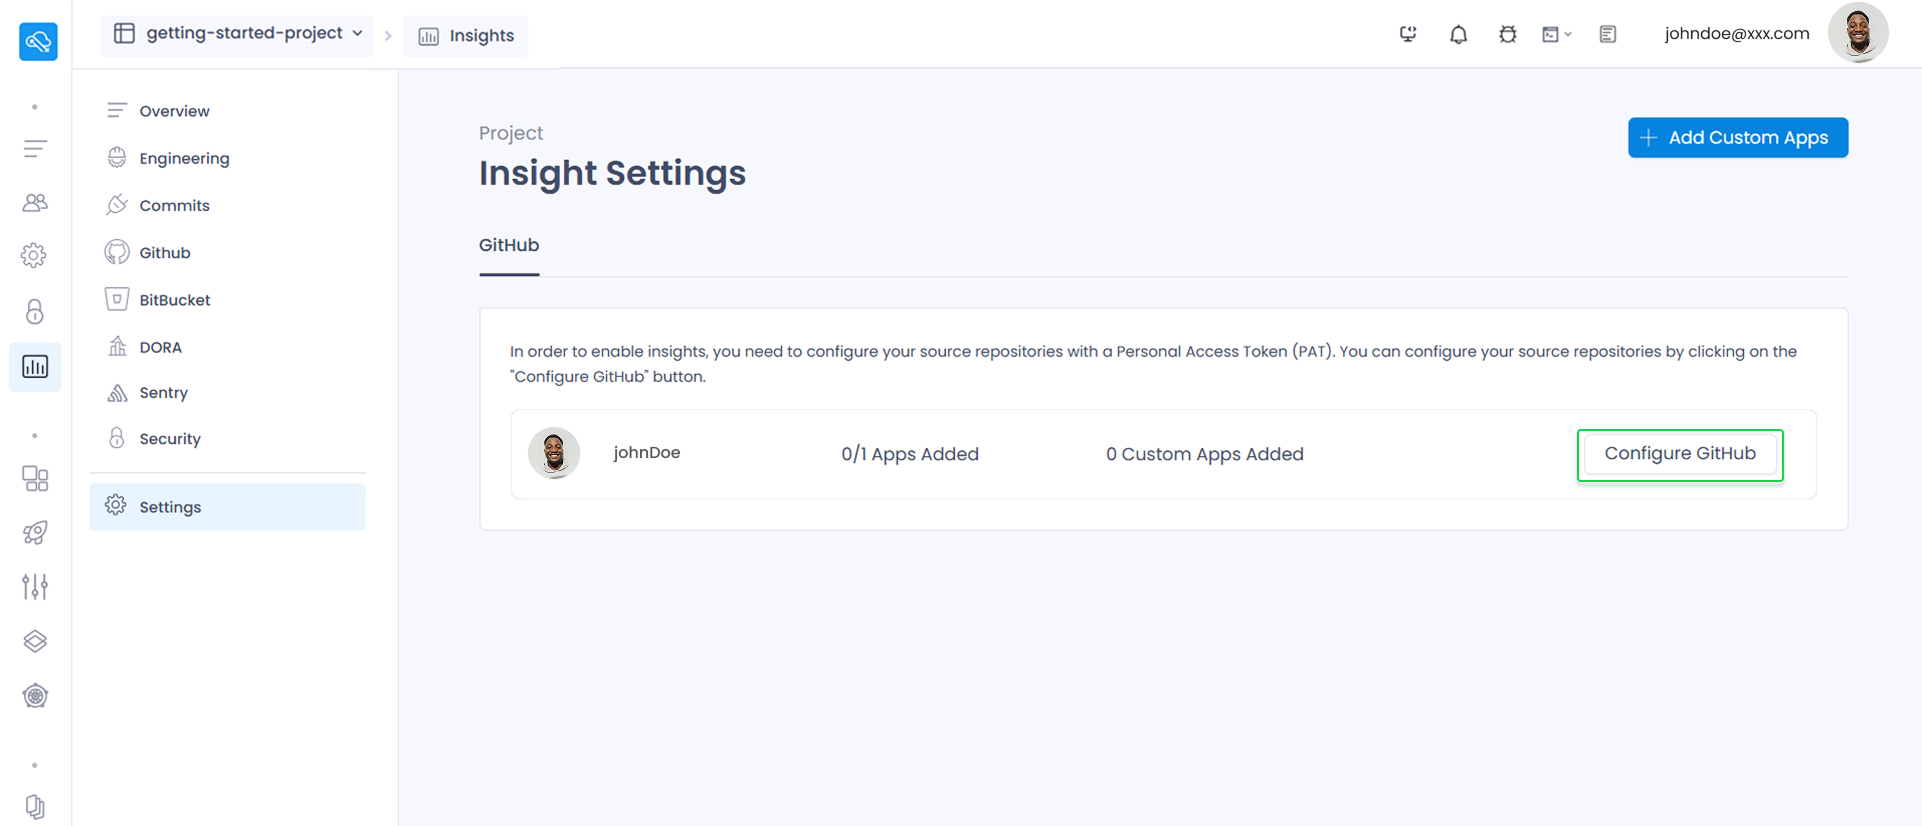
- You will see your configured organization / workspace name, added apps and added custom apps for the insights configurations. ( Added apps through creating apps within the console and Custom apps through the “Add Custom Apps” button in Settings pages )
- Click “Configure Github” button to start the insights configurations.
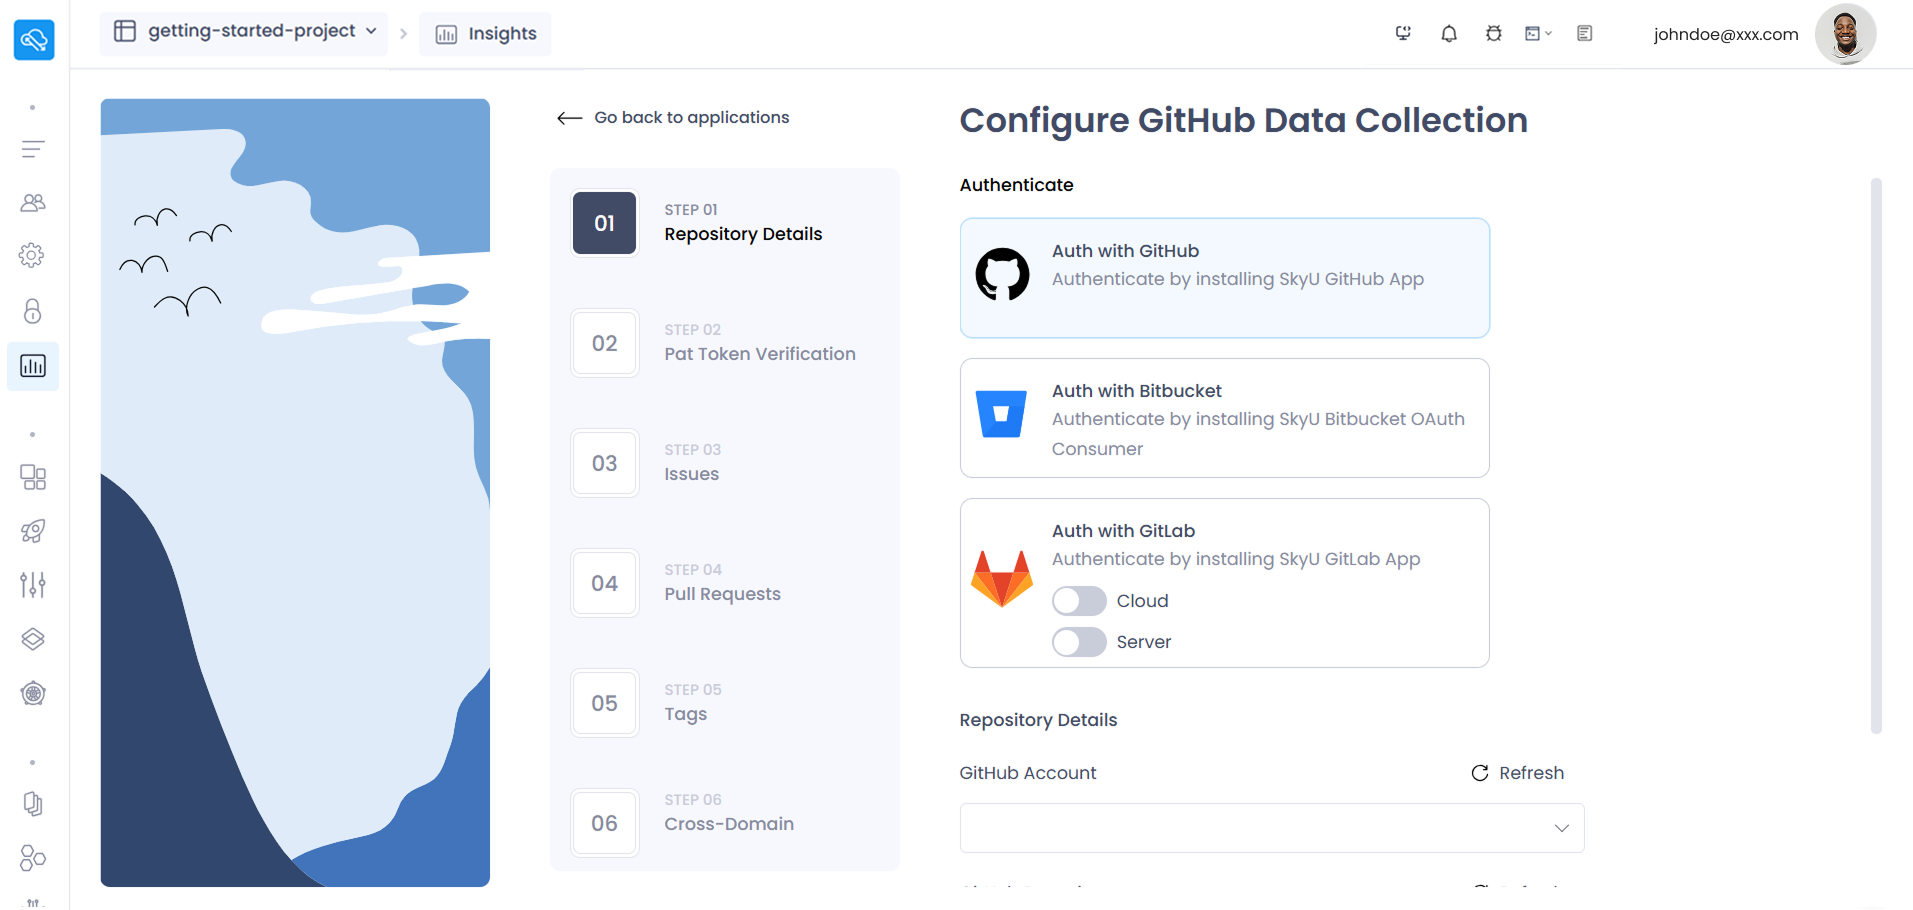
2. Configure GitHub data collection ( For Github connected apps )
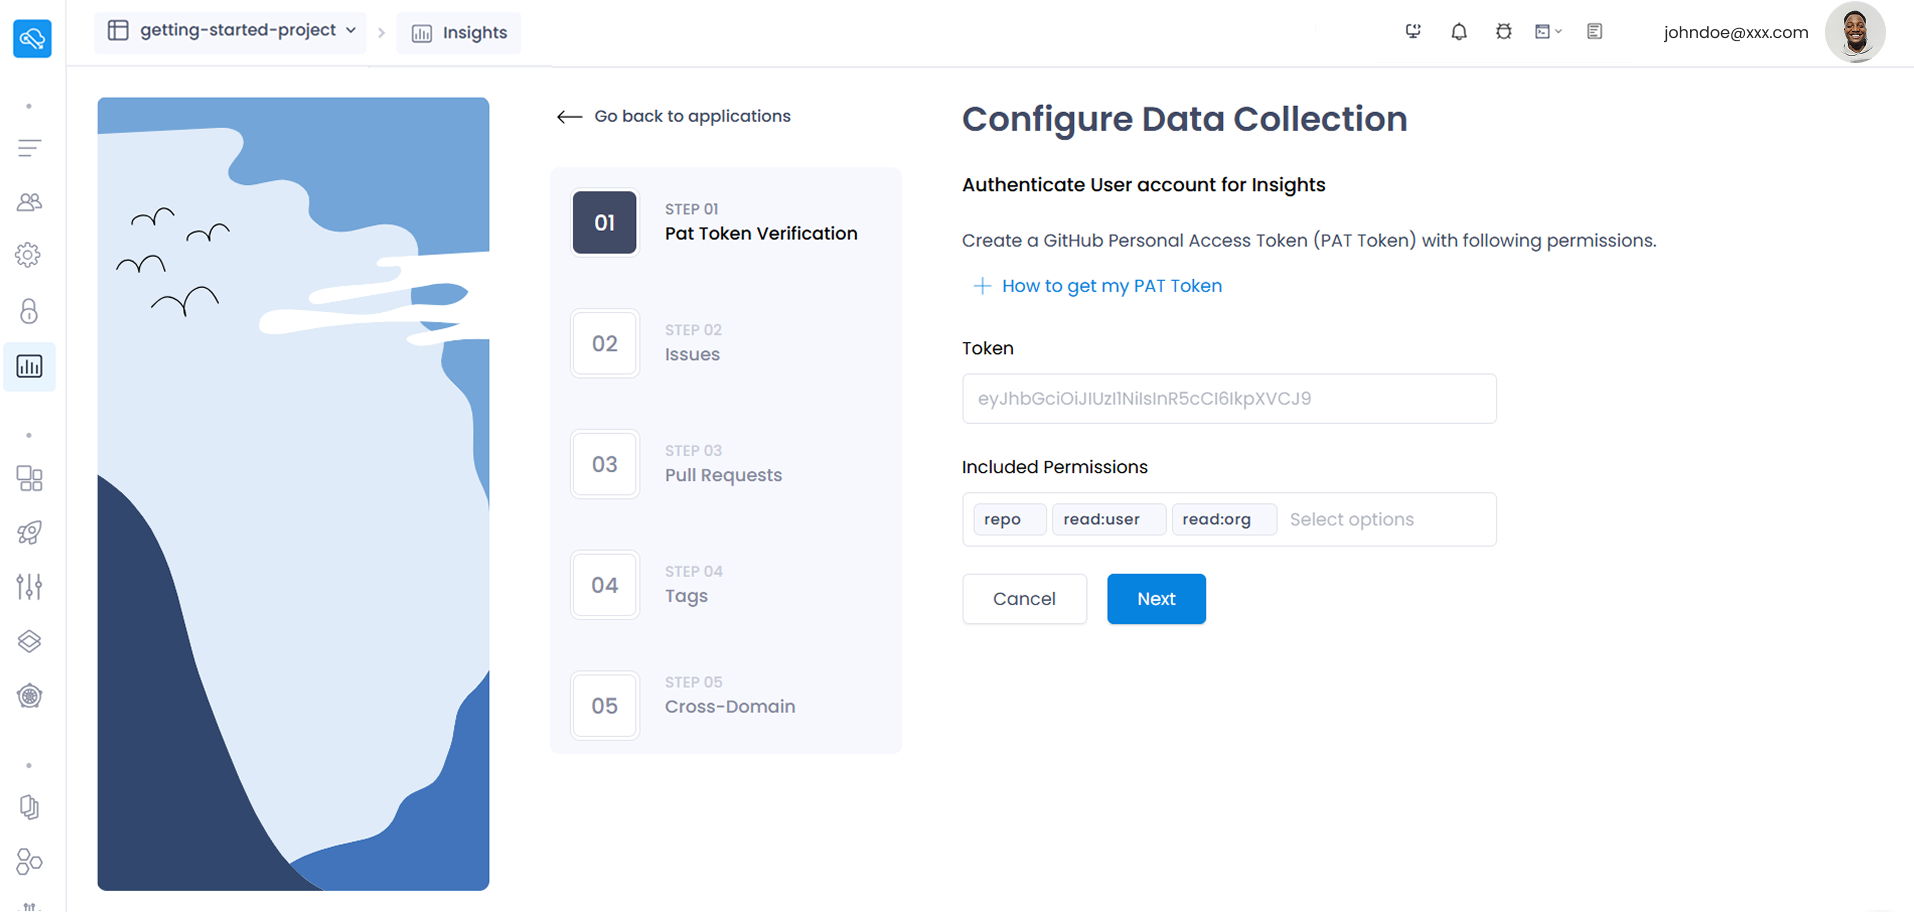
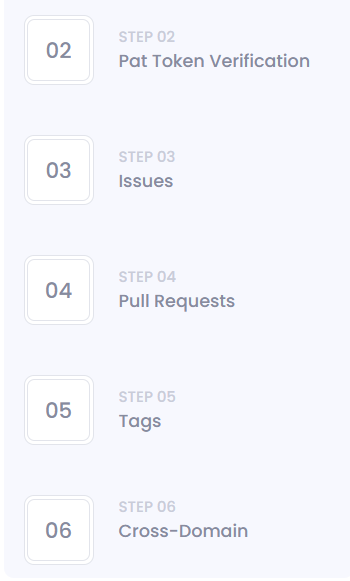
- Create your GitHub PAT (classic) How to get your PAT Token (opens in a new tab) with the given permissions which are under “Included Permissions” and enter that PAT value in the “Pat Token Verification” tab’s Token input.
- After the validation is successful, You will be taken to the “Issues” tab and scroll down to click the “Next” button.
- Click the “Next” button in the “Pull Requests” tab.
- Click the “Next” button in the “Tags” tab.
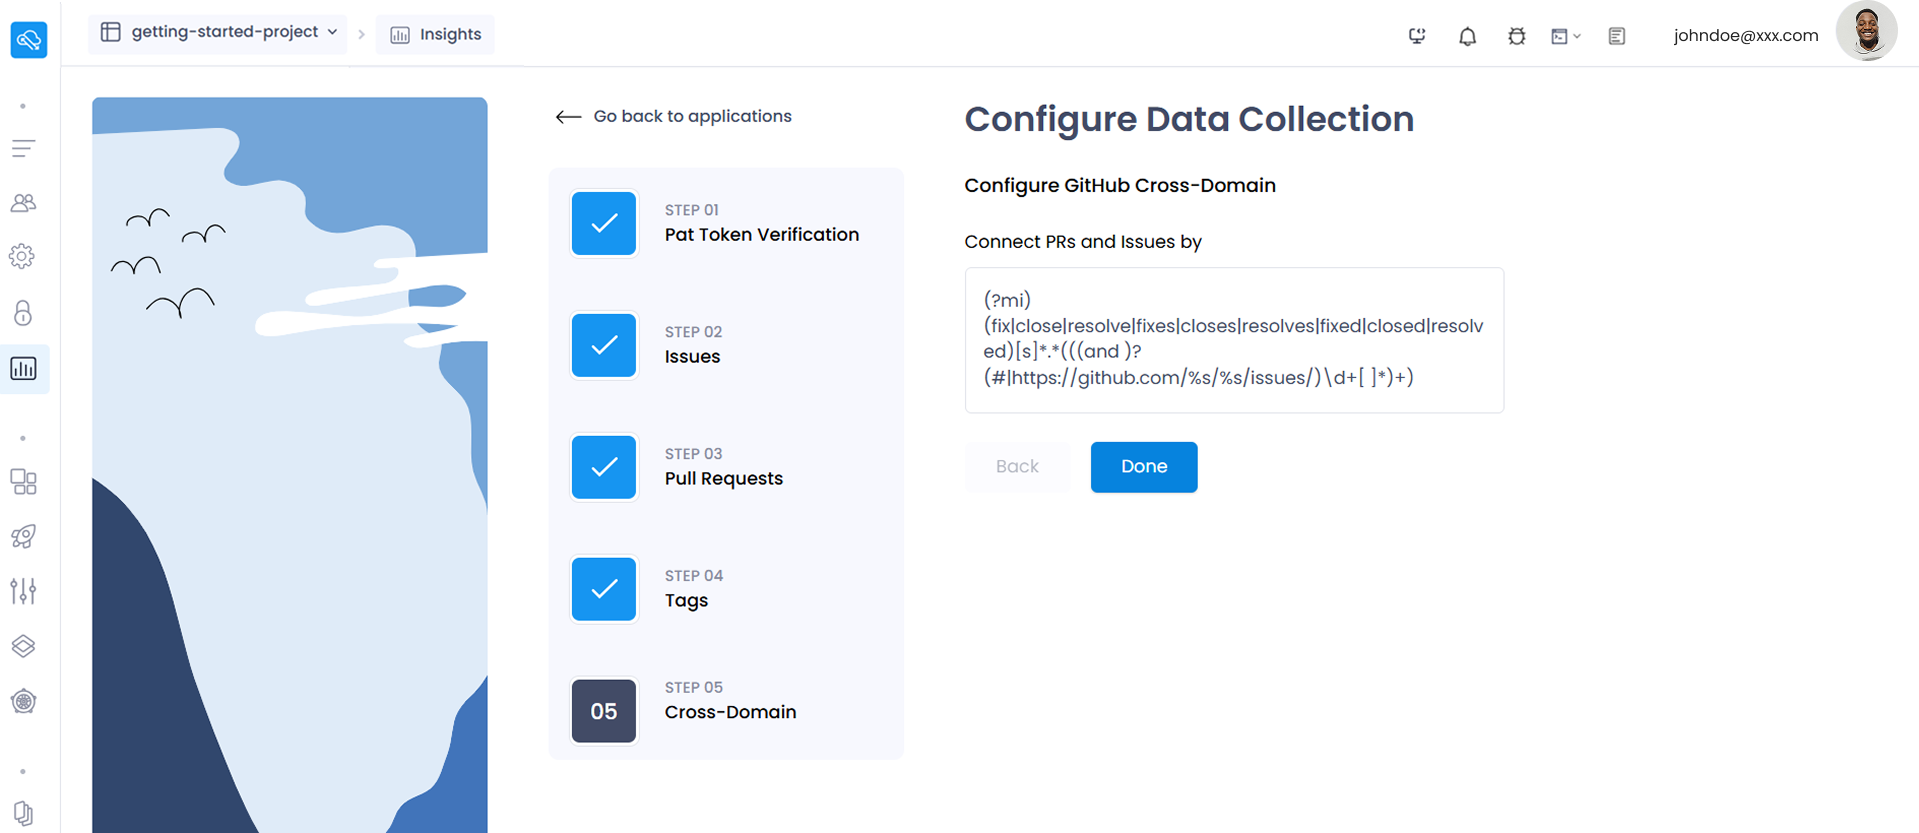
- Click the “Create” button in the “Cross-Domain” tab.
- Once it's configured successfully, you will get the success message and “Done” button to complete the configurations.
- You will be redirected to the Settings page where you can see that the app is configured to use its insights.
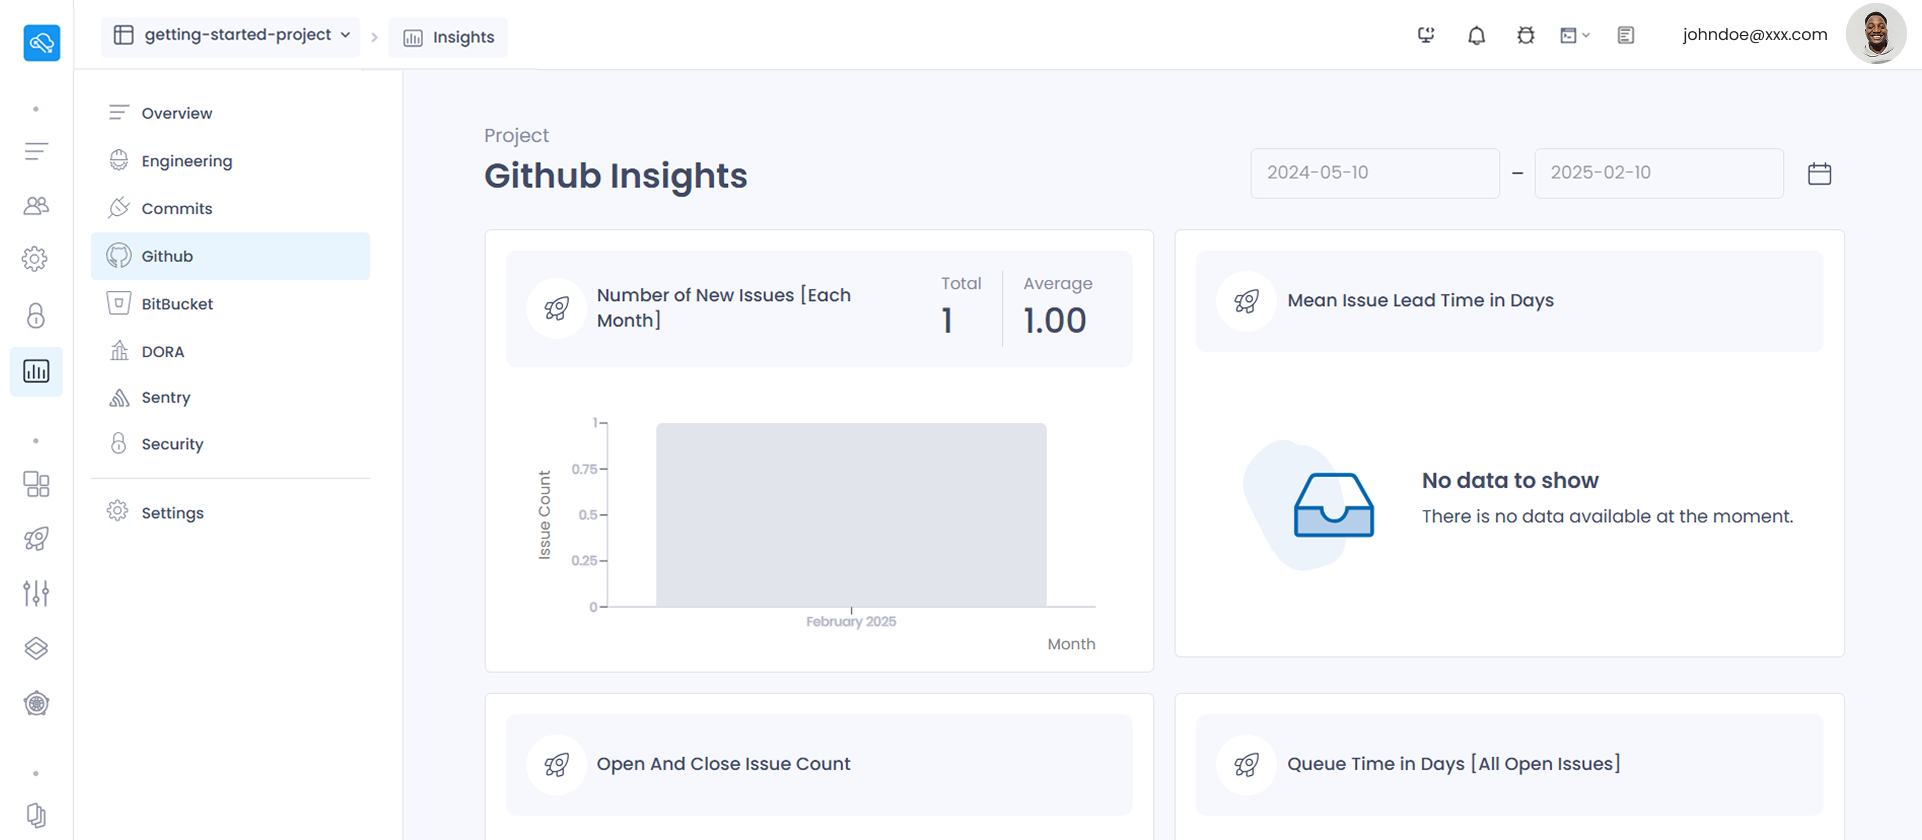
- Click the “Sync With Devlake” button to sync with the latest data in your configured repository.
- Now you can check the Gitbub sidebar item.
3. Custom GitHub app configuration
- Click “+ Add Custom Apps” button to create your custom app insights configuration in the “Insights Settings” page.

- Click "Auth with GitHub" and after the popup, scroll down where you can select the GitHub account and repository.
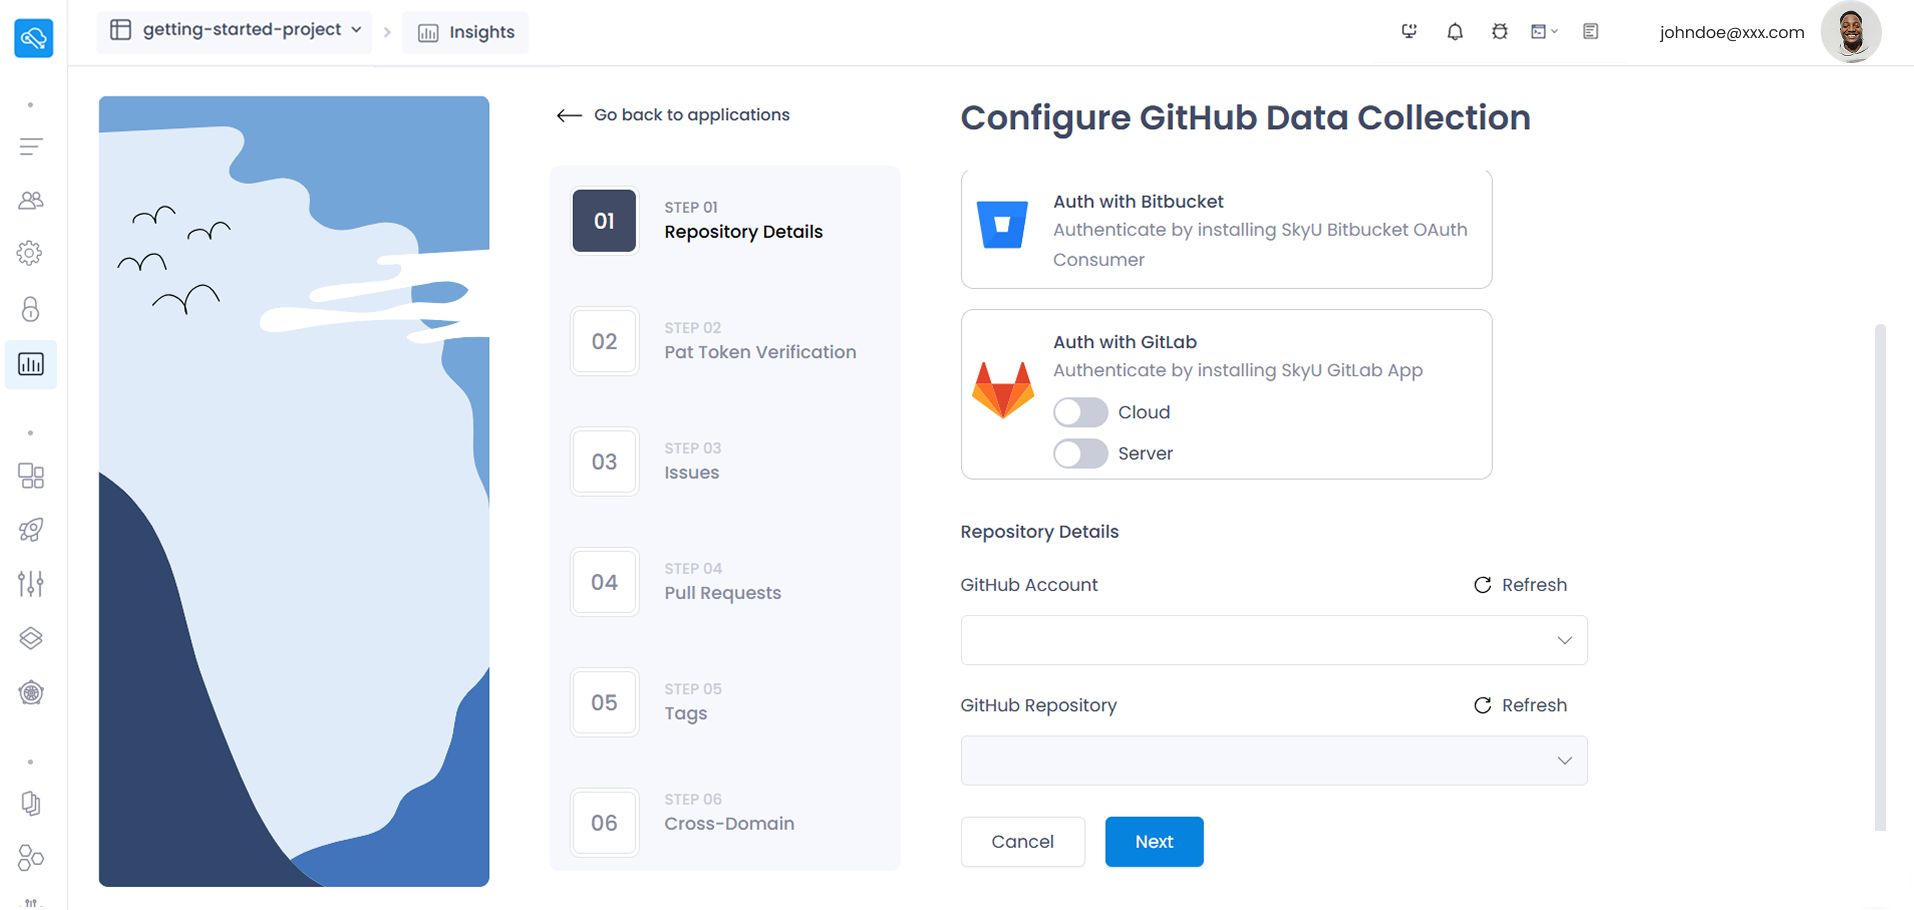
- If the account you want to proceed with exists on the dropdown, you can select it and proceed to selecting its repositories.
- Otherwise if you want to connect with a new account, click "+ Create" and configure with your new account using the installation popup.
- When you are configuring with a new account, you will be going through the steps of the initial process in which is mentioned at the first section of this documentation.
- Finally Click "Create" button to finish your configuration.