DNS Setup
SkyU allows you to configure and manage DNS records seamlessly. With this feature, you can create new domains, configure DNS entries, and enable SSL for secure communication. The DNS setup process integrates with AWS Route 53 for domain management.
DNS Configuration Process
To set up DNS for your application in SkyU, follow these steps:
Navigate to the DNS Section
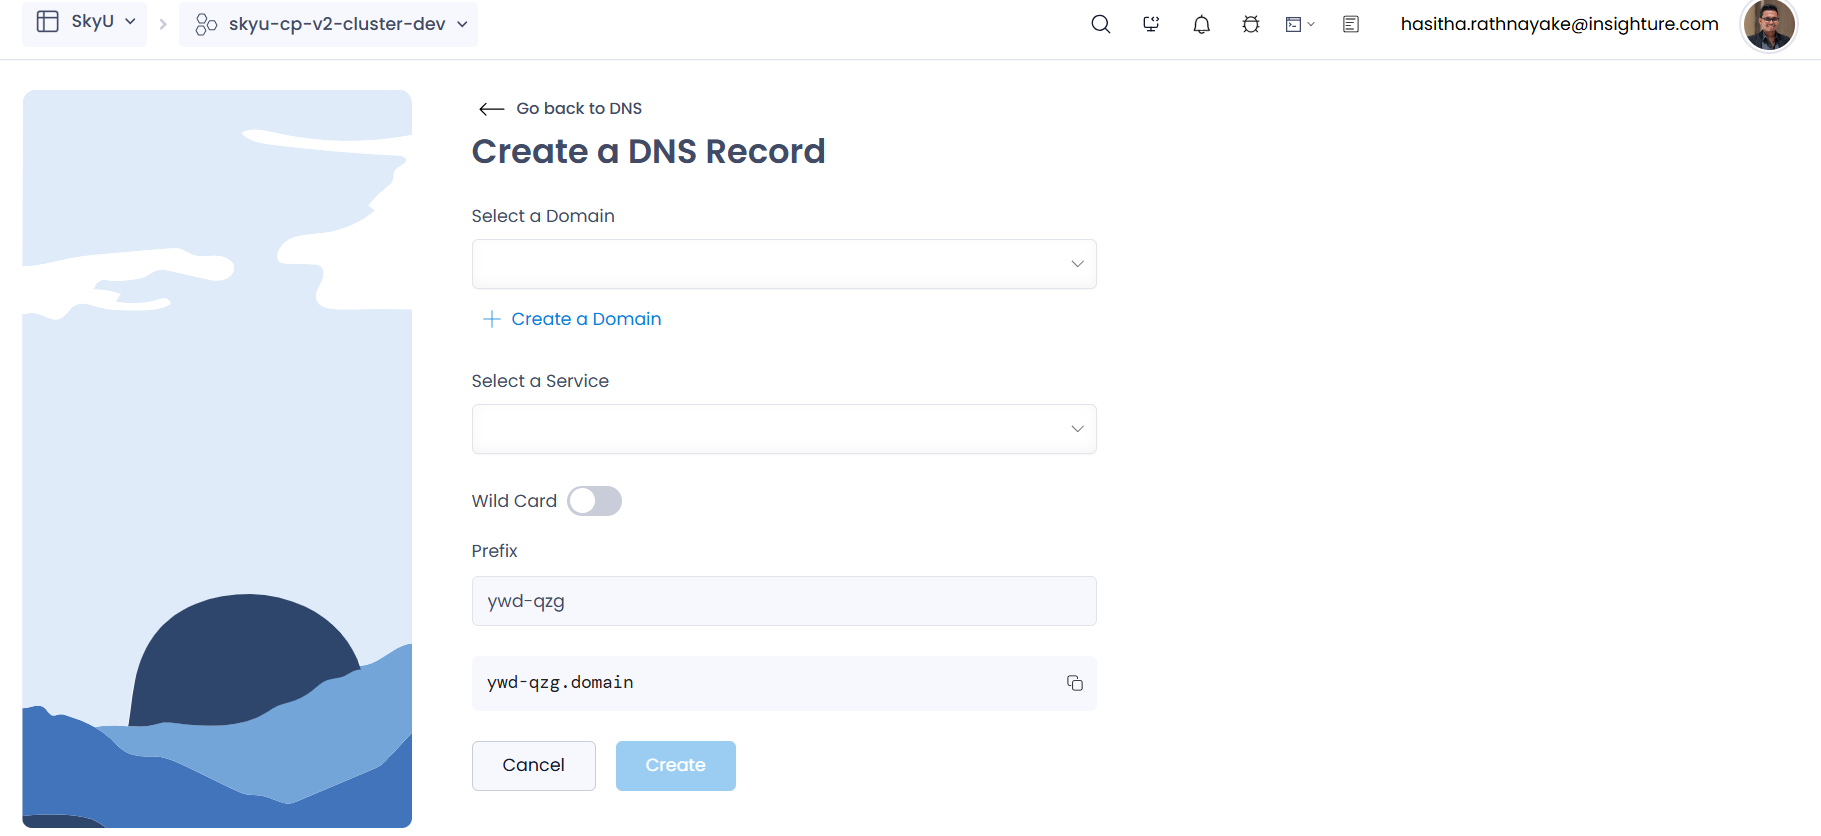
Navigate to the DNS section in the SkyU Console from the left-hand side menu and click on the Create button.

Select or Create Domain
You can either select an existing domain from the dropdown or create a new domain.

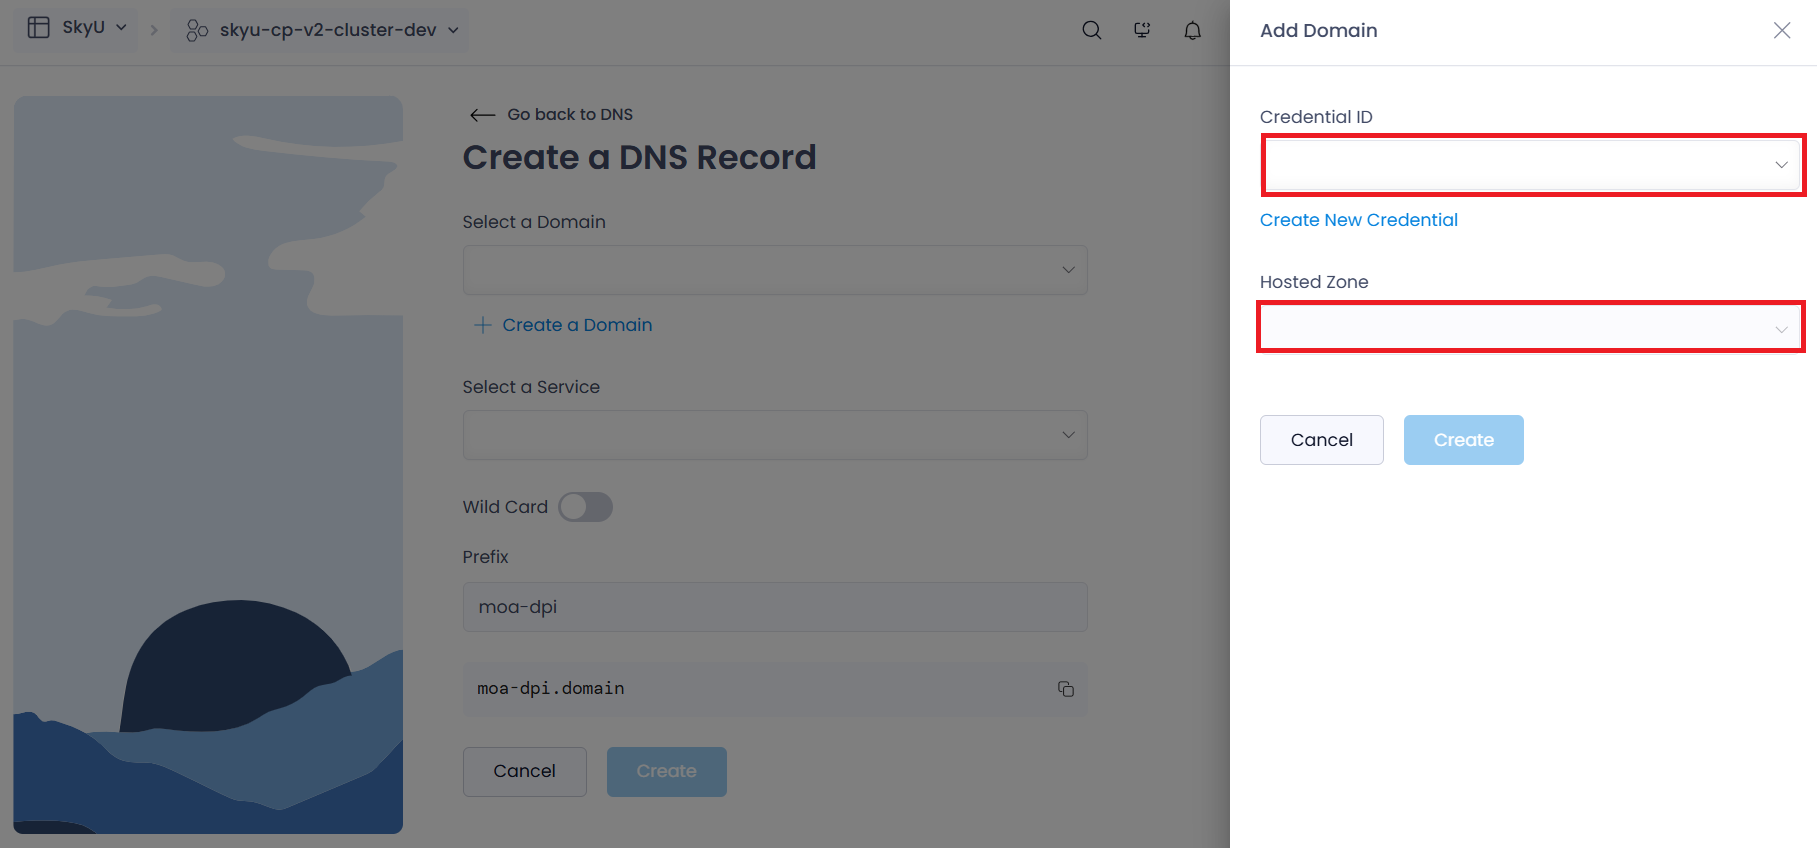
Create New Domain
If you choose to create a new domain, fill in the following details:
| Field | Description | Example |
|---|---|---|
| AWS Credential | Select an AWS credential with Route 53 access to manage hosted zones. | my-aws-credential |
| Hosted Zone | Choose a hosted zone from the dropdown to associate with your domain. | example.com |
Click on Create Domain to add the selected hosted zone as a domain in SkyU.

Configure DNS
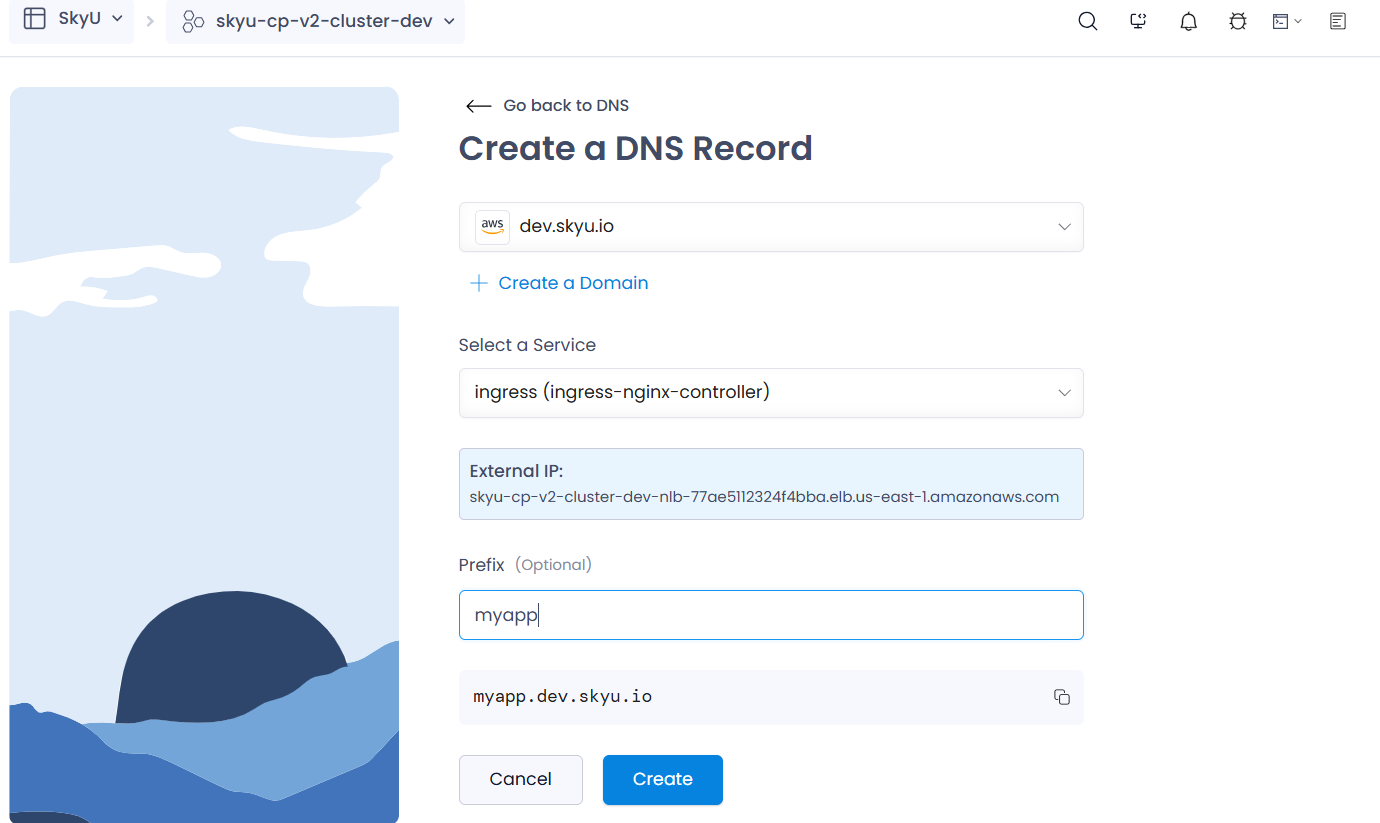
After creating or selecting a domain, configure the DNS details:
| Field | Description | Example |
|---|---|---|
| Domain | Select the domain from the dropdown that you want to use for your application. | example.com |
| Ingress | Specify the Kubernetes Ingress resource that will map the DNS entry to your application. | api-ingress |
| Prefix | Provide the DNS prefix to map your application endpoint (e.g., beta, api, leave blank for root domain). | api |
Click on Create DNS to finalize the DNS configuration.

DNS Listing Page
Once the DNS configuration is complete, you will be redirected to the DNS Listing Page, where all configured DNS records are displayed.
Enable SSL
To secure your application, enable SSL for the DNS entry. Follow these steps:
- Locate the desired DNS record in the listing.
- Click the Enable button under the SSL column.
- SSL will be enabled for the domain, ensuring secure communication.

Enabling SSL ensures encrypted connections to your application, enhancing security and compliance.